 Webpack中的babel
# Webpack中的babel
关于Babel的入门,可看这篇文章Babel 入门教程 (opens new window)
# 为什么需要babel
事实上,在开发中我们很少直接去接触babel,但是babel对于前端开发来说,目前是不可缺少的一部分:
- 开发中,我们想要使用ES6+的语法,想要使用TypeScript,开发React项目,它们都是离不开Babel的;
- 学习Babel对于我们理解代码从编写到线上的转变过程至关重要;
Babel是一个工具链,采用的是微内核架构,主要用于旧浏览器或者缓解中将ECMAScript 2015+代码转换为向后兼容版本的JavaScript代码。
这意味着,你可以用 ES6 的方式编写程序,又不用担心现有环境是否支持。
包括:语法转换、源代码转换、Polyfill实现目标缓解缺少的功能等;
// 转码前
input.map(item => item + 1);

// 转码后
input.map(function (item) {
  return item + 1;
});
# Babel命令行使用
babel本身可以作为一个独立的工具(和postcss一样),可以不和webpack等构建工具配置来单独使用。
如果我们希望在命令行尝试使用babel,需要安装如下库:
@babel/core:babel的核心代码,必须安装;@babel/cli:可以让我们在命令行使用babel;
这里我们在src/main.js中实现如下代码:
const message = 'hello world'

const foo = (info) => {
  console.log(info)
}

foo(message)
在命令行中执行:
npx babel src --out-dir dist
使用babel来处理我们的源代码:
- src:是源文件的目录;
- --out-dir:指定要输出的文件夹dist;
然后查看dist/main.js文件如下:
const message = 'hello world';

const foo = info => {
  console.log(info);
};

foo(message);
可以看到,babel基本没有进行任何转换,只是去掉了箭头函数info参数的括号。
因为这里值使用了babel的内核代码@babel/core,至于main.js代码要如何转化,它是不知道的,所以为了让代码转换成我们想要的格式,就需要给babel设置相关的插件。
比如要转换箭头函数,那么我们就可以使用箭头函数转换相关的插件:
npm install @babel/plugin-transform-arrow-functions -D
然后命令行中使用此插件,输入如下命令:
npx babel src --out-dir dist --plugins=@babel/plugin-transform-arrow-functions
再查看输出结果:
const message = 'hello world';

const foo = function (info) {
  console.log(info);
};

foo(message);
我们可以看到箭头函数已经转换成了普通的匿名函数。
比如要转换const为var,我们需要使用@babel/plugin-transform-block-scoping 来完成这样的功能:
npm install @babel/plugin-transform-block-scoping -D
然后命令行中使用此插件,输入如下命令:
npx babel src --out-dir dist --plugins=@babel/plugin-transform-arrow-functions
查看输出结果可以发现,const已经转换成了var:
var message = 'hello world';

var foo = function (info) {
  console.log(info);
};

foo(message);
# Babel的预设preset
我们在转换箭头函数和const中,使用了两个插件,如果要转换的内容包含许多个ES6特性语法,一个个设置是比较麻烦的,这时我们可以使用预设preset
安装@babel/preset-env预设:
npm install @babel/preset-env -D
这个包是一系列插件的组合,使用此包会自动查找需要的插件来完成代码的转化。实现原理详见此处
执行如下命令:
npx babel src --out-dir dist --presets=@babel/preset-env
可以看到转换结果如下:
"use strict";

var message = 'hello world';

var foo = function foo(info) {
  console.log(info);
};

foo(message);
# Babel的底层原理
编译器的工作是将一种源代码(原生语言)转换成另一种源代码(目标语言)。
Bable其实就是一个编译器,只是将JS代码从一种格式转换成了另一种JS代码格式。
Babel编译器的作用就是将我们的源代码,转换成浏览器可以直接识别的另外一段源代码;
Babel编译器的工作流程有三个阶段:
- 解析阶段(Parsing)
- 转换阶段(Transformation)
- 生成阶段(Code Generation)

当然,这只是一个简化版的编译器工具流程,在每个阶段又会有自己具体的工作,流程如下:

可以结合代码看下具体的执行流程:
我们有如下原生源代码:
const name = "ccbean"; const foo = (name) => console.log(name); foo(name);进行词法分析(Lexical Analysis),它会读取整个源代码文件,将整个源代码读取成字符串,代码中每个内容都会被提取出来,如第一行有5个部分,那么就会提取
const、name、=、"ccbean"、;共5个部分。词法分析提取的每个部分会生成tokens数组,如下就是我们的代码在分析后得到的tokens数组,可以看到其中包含了一个个
{type, value}元素,这些就是词法分析时提取的一个个词法。- type标识了每个词的类型,如关键字
Keyword、标识符Identifier、标点符号Punctuator、字符串String。 - value标识了所有词的对应值。
[ { "type": "Keyword", "value": "const" }, { "type": "Identifier", "value": "foo" }, { "type": "Punctuator", "value": "=" }, { "type": "Punctuator", "value": "(" }, { "type": "Identifier", "value": "name" }, { "type": "Punctuator", "value": ")" }, { "type": "Punctuator", "value": "=>" }, { "type": "Identifier", "value": "console" }, { "type": "Punctuator", "value": "." }, { "type": "Identifier", "value": "log" }, { "type": "Punctuator", "value": "(" }, { "type": "Identifier", "value": "name" }, { "type": "Punctuator", "value": ")" }, { "type": "Punctuator", "value": ";" }, { "type": "Identifier", "value": "foo" }, { "type": "Punctuator", "value": "(" }, { "type": "String", "value": "\"ccbean\"" }, { "type": "Punctuator", "value": ")" }, { "type": "Punctuator", "value": ";" } ]- type标识了每个词的类型,如关键字
根据tokens数组中的词法,进行语法分析(syntatic analysis),也称为Parsing,那么会生成抽象语法树。
{ "type": "Program", "body": [ { "type": "VariableDeclaration", "declarations": [ { "type": "VariableDeclarator", "id": { "type": "Identifier", "name": "foo" }, "init": { "type": "ArrowFunctionExpression", "id": null, "params": [ { "type": "Identifier", "name": "name" } ], "body": { "type": "CallExpression", "callee": { "type": "MemberExpression", "computed": false, "object": { "type": "Identifier", "name": "console" }, "property": { "type": "Identifier", "name": "log" } }, "arguments": [ { "type": "Identifier", "name": "name" } ] }, "generator": false, "expression": true, "async": false } } ], "kind": "const" }, { "type": "ExpressionStatement", "expression": { "type": "CallExpression", "callee": { "type": "Identifier", "name": "foo" }, "arguments": [ { "type": "Literal", "value": "ccbean", "raw": "\"ccbean\"" } ] } } ], "sourceType": "script" }对抽象语法树进行遍历(Traversal),访问(Visitor)树中每一个节点。那么在这个访问过程中,假如想要将
const关键字转换成为var关键字,那么就可以在访问的过程中应用插件(Plugin),对节点中的代码进行修改。在整个遍历过程中,当有节点需要进行转换时,就应用对应的插件进行代码修改。当遍历完整颗树之后,就会生成一颗新的抽象语法树。
{
  "type": "Program",
  "body": [
    {
      "type": "VariableDeclaration",
      "declarations": [
        {
          "type": "VariableDeclarator",
          "id": {
            "type": "Identifier",
            "name": "foo"
          },
          "init": {
            "type": "FunctionExpression",
            "id": {
              "type": "Identifier",
              "name": "foo"
            },
            "params": [
              {
                "type": "Identifier",
                "name": "name"
              }
            ],
            "body": {
              "type": "BlockStatement",
              "body": [
                {
                  "type": "ReturnStatement",
                  "argument": {
                    "type": "CallExpression",
                    "callee": {
                      "type": "MemberExpression",
                      "computed": false,
                      "object": {
                        "type": "Identifier",
                        "name": "console"
                      },
                      "property": {
                        "type": "Identifier",
                        "name": "log"
                      }
                    },
                    "arguments": [
                      {
                        "type": "Identifier",
                        "name": "name"
                      }
                    ]
                  }
                }
              ]
            },
            "generator": false,
            "expression": false,
            "async": false
          }
        }
      ],
      "kind": "var"
    },
    {
      "type": "ExpressionStatement",
      "expression": {
        "type": "CallExpression",
        "callee": {
          "type": "Identifier",
          "name": "foo"
        },
        "arguments": [
          {
            "type": "Literal",
            "value": "ccbean",
            "raw": "\"ccbean\""
          }
        ]
      }
    }
  ],
  "sourceType": "script"
}
根据新的AST再生成最终的转换代码。
"use strict";

var name = "ccbean";

var foo = function foo(name) {
  return console.log(name);
};

foo(name);
这就是babel的整个执行流程即运行原理。所以,无论是要转换什么样的代码,如TypeScript代码、ES6代码、JSX代码,只需要在合适的位置应用对应的插件,将代码转成一个新的AST,再根据新AST进行输出,就会得到我们想要的转换效果了。
关于编译器,可查看the-super-tiny-compiler (opens new window)来学习更多,这是一个使用JS来实现的编译器。
# Webpack中使用babel
在实际开发中,我们通常会在构建工具中通过配置babel来对其进行使用的,比如在webpack中。
在Webpack中使用babel,需要安装相应的loader,即babel-loader。
npm install babel-loader -D
我们还需要用到@babel/core和项目中需要用到的babel插件或预设,这里做测试安装如下库:
npm install @babel/core @babel/plugin-transform-arrow-functions @babel/plugin-transform-block-scoping @babel/preset-env -D
我们配置规则来使用Babel:
module: {
  rules: [
    {
      test: /\.js$/,
      use: {
        loader: 'babel-loader'
      }
    }
  ]
},
执行npm run build,可看到结果如下:
// bundle.js
(function () {
  var __webpack_exports__ = {};

  const name = 'ccbean';

  const foo = name => {
    console.log(name);
  };

  foo(name);
})();
# 使用babel插件
这里并没有转换代码,我们需要配置插件,这里配置了两个插件:
module: {
  rules: [
    {
      test: /\.js$/,
      use: {
        loader: 'babel-loader',
        options: {
          plugins: [
            '@babel/plugin-transform-arrow-functions',
            '@babel/plugin-transform-block-scoping'
          ]
        }
      }
    }
  ]
},
执行npm run build,可看到结果如下,转换了箭头函数和关键字const:
(function () {
  var __webpack_exports__ = {};

  var name = 'ccbean';

  var foo = function (name) {
    console.log(name);
  };

  foo(name);
})();
# 使用babel预设
如果我们一个个去安装使用插件,那么需要手动来管理大量的babel插件,我们可以直接给webpack提供一个preset,webpack会根据我们的预设来加载对应的插件列表,并且将其传递给babel。
Babel的预设 (opens new window)有四个:
- env:
@babel/preset-env - react:
@babel/preset-react - typescript:
@babel/preset-typescript - flow:
@babel/preset-flow
开发中可以根据需求设置一个或多个预设。
这里我们做测试,只安装preset-env:
npm install @babel/preset-env -D
然后进行配置:
{
  test: /\.js$/,
  use: {
    loader: 'babel-loader',
    options: {
      presets: [
        '@babel/preset-env'
      ]
    }
  }
}
执行npm run build,可看到结果如下:
(function () {
  var __webpack_exports__ = {};
  var name = 'ccbean';

  var foo = function foo(name) {
    console.log(name);
  };

  foo(name);
})();
# 设置目标浏览器
我们最终打包的JavaScript代码,是需要跑在目标浏览器上的,那么如何告知babel我们的目标浏览器呢?
有两种方法:
- browserslist工具
- targets属性
使用browserslist
使用预设,Babel在进行代码转换时,默认会根据目标浏览器的需要进行代码转换。默认会读取browserslist配置来获取需要适配的浏览器,然后再根据适配要求进行代码转换。
.browserslistrc配置如下
last 2 version
执行npm run build,可看到结果如下:
(function () {
  var __webpack_exports__ = {};
  var message = 'hello world';

  var foo = function foo(info) {
    console.log(info);
  };

  foo(message);
})();
修改.browserslistrc如下:
chrome88
执行npm run build,可看到结果如下:
(() => {
  var __webpack_exports__ = {};
  const message = 'hello world';

  const foo = info => {
    console.log(info);
  };

  foo(message);
})();
使用targets属性
我们也可以通过targets来进行配置目标浏览器
module: {
  rules: [
    {
      test: /\.js$/,
      use: {
        loader: 'babel-loader',
        options: {
          presets: [
            ['@babel/preset-env', {
              // 数组格式,第二个元素设置options
              targets: "last 2 version"
            }]
          ]
        }
      }
    }
  ]
}
执行npm run build,可看到结果如下:
(function () {
  var __webpack_exports__ = {};
  var message = 'hello world';

  var foo = function foo(info) {
    console.log(info);
  };

  foo(message);
})();
如果两个同时配置了,targets属性的优先级更高,会覆盖browserslist。但是在开发中,更推荐通过browserslist来配置;类似的postcss工具,也会使用browserslist。方便进行统一浏览器的适配。
# Babel的Stage-X设置
在babel7之前(比如babel6中),我们会经常看到这种设置方式:
module.exports = {
  "presets": ["stage-0"]
}
上面的配置表达的含义是使用对应的babel-preset-stage-x预设,通常在旧的项目中会看到类似的配置;从babel7开始,已经不建议使用了,建议使用preset-env来设置。
不过我们还是要了解下Stage-X是什么含义,要了解Stage-X,我们需要先了解一下TC39的组织:
- TC39是指技术委员会(Technical Committee)第 39 号;
- 它是 ECMA 的一部分,ECMA 是 “ECMAScript” 规范下的 JavaScript 语言标准化的机构;
- ECMAScript 规范定义了 JavaScript 如何一步一步的进化、发展;
TC39 遵循的原则是:分阶段加入不同的语言特性,新流程涉及四个不同的 Stage:
- Stage 0:strawman(稻草人),任何尚未提交作为正式提案的讨论、想法变更或者补充都被认为是第 0 阶段的"稻草人";
- Stage 1:proposal(提议),提案已经被正式化,并期望解决此问题,还需要观察与其他提案的相互影响;
- Stage 2:draft(草稿),Stage 2的提案应提供规范初稿、草稿。此时,语言的实现者开始观察 runtime 的具体实现是否合理;
- Stage 3:candidate(候补),Stage 3提案是建议的候选提案。在这个高级阶段,规范的编辑人员和评审人员必须在最终规范上签字。Stage 3 的提案不会有太大的改变,在对外发布之前只是修正一些问题;
- Stage 4:finished(完成),进入Stage 4的提案将包含在 ECMAScript 的下一个修订版中;
# Babel的配置文件
babel的配置信息可以放到一个独立的文件中,一是简化webpack中Rule的loader编写,二是多个地都需要使用babel,那么babel配置可以复用。
babel给我们提供了两种配置文件的编写:
babel.config.json(或者.js、.cjs、.mjs)文件;.babelrc.json(或者.babelrc、.js、.cjs、.mjs)文件;
它们两个有什么区别呢?目前很多的项目都采用了多包管理的方式(babel本身、element-plus、umi等);
.babelrc.json:早期使用较多的配置方式,但是对于配置Monorepos项目是比较麻烦的;babel.config.json(babel7):可以直接作用于Monorepos项目的子包,更加推荐;
注:Monorepos是管理项目的一种方式即一个项目中分多个包,对应的是Multirepos即多仓库。
我们使用babel.config.js作为babel的配置文件,如下:
module.exports = {
  plugins: [
    // '@babel/plugin-transform-arrow-functions',
    // '@babel/plugin-transform-block-scoping'
  ],
  presets: [
    '@babel/preset-env',
    // ['@babel/preset-env', {
    //   targets: "last 2 version"
    // }],
  ],
}
在webpack.config.js中修改配置:
module: {
  rules: [
    {
      test: /\.js$/,
      loader: 'babel-loader'
    }
  ]
}
.browserslistrc中配置
> 1%
last 2 version
not dead
再执行构建可看到如下结果:
(function () {
  var __webpack_exports__ = {};
  var message = 'hello world';

  var foo = function foo(info) {
    console.log(info);
  };

  foo(message);
})();
可以修改相关配置再进行构建,测试配置是否生效。
# polyfill
# 认识polyfill
什么是polyfill?可以理解成填充物、垫片、补丁,是为了帮助我们更好的使用JavaScript。
为什么需要使用polyfill?
Babel默认只转换新的JavaScript句法(syntax),而不转换新的API,比如Iterator、Generator、Set、Maps、Proxy、Reflect、Symbol、Promise等全局对象,以及一些定义在全局对象上的方法(比如Object.assign、Array.prototype.from)都不会转码,目标浏览器中没有这个新API时,就会报错。
举例来说,当使用Promise这个语法特性时,目标浏览器中可能没有这个特性,就会报错。那么,可以使用polyfill来增加一个垫片或者说打一个补丁,将该特性包含到打包代码中,保证代码可以正常运行。
在main.js中有如下代码:
const message = 'hello world'

const foo = (info) => {
  console.log(info)
}

foo(message)

const p = new Promise((resolve, reject) => {})
运行npm run build进行打包
(function () {
  var __webpack_exports__ = {};
  var message = 'hello world';

  var foo = function foo(info) {
    console.log(info);
  };

  foo(message);
  var p = new Promise(function (resolve, reject) { });
})();
可以看到,我们的代码被转成了ES5风格,但是却包含了ES6中才出现的Promsie API,有些浏览器不支持它,运行就会报错。
这时,使用polyfill提供Promise API的垫片。
# 使用polyfill
babel7.4.0之前,可以使用@babel/polyfill (opens new window)的包,但是该包现在已经不推荐使用了,安装时会有警告:
> npm i @babel/polyfill
// 警告
npm WARN deprecated @babel/polyfill@7.12.1: 🚨 This package has been deprecated in favor of separate inclusion of a polyfill and regenerator-runtime (when needed). See the @babel/polyfill docs (https://babeljs.io/docs/en/babel-polyfill) for more information.
npm WARN deprecated core-js@2.6.12: core-js@<3.4 is no longer maintained and not recommended for usage due to the number of issues. Because of the V8 engine whims, feature detection in old core-js versions could cause a slowdown up to 100x even if nothing is polyfilled. Please, upgrade your dependencies to the actual version of core-js.
@babel/polyfill包含了定制的regenerator runtime (opens new window) and core-js (opens new window)
babel7.4.0之后,不推荐直接使用@babel/polyfill,可以通过单独引入core-js和regenerator-runtime来完成polyfill的使用
npm install core-js regenerator-runtime --save
然后,我们需要在babel.config.js文件中进行配置,给预设配置一些属性。
useBuiltIns:设置以什么样的方式来使用polyfill,共有三个选项:false默认值。打包后的文件不使用polyfill来进行适配。并且这时是不需要设置corejs属性的usage根据源代码中出现的语言特性,自动检测代码中所需要的polyfill,只导入用到的API。这样可以确保最终包里的polyfill数量的最小化,打包的包相对会小一些entry导入所有的polyfill,无论源代码中是否有用到相应的语言特性。这样会根据browserslist目标导入所有的polyfill,对应的包会更大。应用场景:如果我们依赖的某一个库本身使用了某些polyfill的特性,但是因为我们使用的是usage,所以之后用户浏览器可能会报错;
使用方式:入口文件中需要导入要应用的corejs和runtime
import 'core-js/stable';
import 'regenerator-runtime/runtime';
corejs:设置corejs的版本,默认版本是2.0,目前使用较多的是3.x的版本;可以自行指定。这个选项只有在和useBuiltIns同时使用时才起作用。- 另外corejs可以设置是否对提议阶段的特性进行支持,设置 proposals属性为true即可。
设置useBuiltIns: 'usage'
代码中需要用到的polyfill才引入。
babel.config.js设置如下:
module.exports = {
  presets: [
    ['@babel/preset-env', {
      useBuiltIns: false,
    }]
  ]
}
此外,我们通常要在规则中配置exclude排除对node_modules目录中应用polyfill:
{
  test: /\.js$/,
  loader: 'babel-loader',
  exclude: /node_modules/
}
npm run build执行构建后可以看到打包文件会多出来很多polyfill注入的代码。
设置useBuiltIns: 'entry'
导入所有的pofill,无论代码中是否用到。
babel.config.js设置如下:
module.exports = {
  presets: [
    ['@babel/preset-env', {
      useBuiltIns: 'entry', // false usage entry
      corejs: 3
    }]
  ]
}
入口文件main.js手动引入:
import 'core-js/stable'
import 'regenerator-runtime/runtime'

// ...

const p = new Promise((resolve, reject) => {})
npm run build执行构建后可以看到生成的文件更大。
# 认识plugin-transform-runtime
在前面我们使用的polyfill,默认情况是添加的所有特性都是全局的。
这个插件有两个作用:
- 避免多出使用的相同的函数被重复编译输出。
- 避免polyfill全局污染。如果我们正在编写一个工具库,这个工具库需要使用polyfill;别人在使用我们工具时,工具库通过polyfill添加的特性,可能会污染他的代码;
所以,当编写工具时,babel更推荐我们使用一个插件: @babel/plugin-transform-runtime (opens new window)来完成polyfill的功能;
# 使用plugin-transform-runtime
安装 @babel/plugin-transform-runtime:
npm install @babel/plugin-transform-runtime -D
使用plugins来配置babel.config.js:
module.exports = {
  presets: [
    '@babel/preset-env',
  ],
  plugins: [
    ['@babel/plugin-transform-runtime', {
      corejs: 3
    }]
  ]
}
使用这个插件时,我们就不需要再使用@babel/preset-env中的useBuiltIns属性。
这里我们使用corejs的版本是3,还需要安装对应的runtime helpers (opens new window)
npm install @babel/runtime-corejs3 -D
npm run build执行构建后可以看到生成的生成结果。
# babel转换各类JS
# React的JSX编译
在我们编写react代码时,react使用的语法是jsx,jsx是可以直接使用babel来转换的。
对react jsx代码进行处理需要如下的插件:
- @babel/plugin-syntax-jsx
- @babel/plugin-transform-react-jsx
- @babel/plugin-transform-react-display-name
但是开发中,并不需要一个个去安装这些插件,可以直接使用官方提供的预设babel-preset-react (opens new window)来配置:
npm install @babel/preset-react -D
然后配置应用此预设:
module.exports = {
  presets: [
    ['@babel/preset-env'],
    ['@babel/preset-react'],
  ]
}
要使用react,这里我们需要安装react开发相关依赖:
npm i react react-dom -D
编写react_index.js文件,并配置其为入口文件:
import React from 'react'
import ReactDOM from 'react-dom'

class App extends React.Component {
  constructor(props) {
    super(props);
    this.state = {
      message: 'Hello React'
    }
  }

  render() {
    return (
      <h2>{this.state.message}</h2>
    )
  }
}

ReactDOM.render(<App/>, document.getElementById('app'))
浏览器中打开build/index.html可以看到Hello React被渲染了出来。
# TypeScript的编译
在项目开发中,我们会使用TypeScript来开发,那么TypeScript代码是需要转换成JavaScript代码。
可以通过TypeScript的compiler来转换成JavaScript:
npm install typescript -D
TypeScript的编译配置信息我们通常会编写一个tsconfig.json文件。那么先进行初始化:
npx tsc --init
之后我们可以运行npx tsc来编译自己的TS代码
npx tsc
如我们有一个文件ts_main.ts:
const message: string = "Hello TypeScript";

const foo = (info: string) => {
  console.log(info);
}

foo(message);

export {}
执行编译npx tsc,生成文件如下:
"use strict";
Object.defineProperty(exports, "__esModule", { value: true });
const message = "Hello TypeScript";
const foo = (info) => {
    console.log(info);
};
foo(message);
如果我们希望在webpack中使用TypeScript,那么我们可以使用ts-loader来处理ts文件:
npm install ts-loader -D
然后配置Webpack的Rule:
{ // 编译ts
  test: /\.ts$/,
  use: [
    'ts-loader'
  ]
}
然后执行npm run build就可以使用Webpack编译TS代码了。但是这种方式有一个问题,如果我们在代码中使用了ES6+新API,ts-loader并不会对代码进行polyfill。
假如我们代码中使用了Promise:
const message: string = "Hello TypeScript";

const foo = (info: string) => {
  console.log(info);
}

foo(message);

const p = new Promise((resolve, reject) => {})

export {}
编译结果如下,可以看到并没有转换Promsie,在不是Promise的浏览器上就会出现报错:
(function () {
  "use strict";
  var __webpack_exports__ = {};
  !function () {
    var exports = __webpack_exports__;
    Object.defineProperty(exports, "__esModule", ({ value: true }));
    const message = "Hello TypeScript";
    const foo = (info) => {
      console.log(info);
    };
    foo(message);
    const p = new Promise((resolve, reject) => { });

  }();
})();
如果想要增加Polyfill,可以使用Babel提供的预设@babel/preset-typescript (opens new window)
安装预设:
npm install @babel/preset-typescript -D
配置babel.config.js
module.exports = {
  presets: [
    ['@babel/preset-env', {
      useBuiltIns: 'usage',
      corejs: 3
    }],
    ["@babel/preset-typescript"]
  ]
}
配置Webpack的Rule:
{
  test: /\.ts$/,
  use: [
    'babel-loader'
  ]
}
再进行build构建,可以看到代码有polyfill的处理。
不过,这种方案也有一个缺陷,babel-loader只会对TS代码进行转化,并不会对TS代码进行验证。
来看下面的例子
const foo = (info: string) => {
  console.log(info);
}

foo(123);
函数foo()要求传入参数必须是string类型,但是这里传入了number类型,执行编译,可以看到并没有报错:
$ npm run build
> webpack

asset index.html 323 bytes [emitted]
asset bundle.js 269 bytes [emitted] (name: main) 1 related asset
./src/main.ts 65 bytes [built] [code generated]
webpack 5.72.0 compiled successfully in 1678 ms
使用ts-loader可以看到如下错误:
npm run build

> webpack

[tsl] ERROR in D:\Code\Webpack\hello-webpack\09_webpack中babel转换各类JS\src\main.ts(5,5)
      TS2345: Argument of type 'number' is not assignable to parameter of type 'string'.
ts-loader-default_e3b0c44298fc1c14
总结如下:
- 使用ts-loader(TypeScript Compiler),来直接编译TypeScript,那么只能将ts转换成js
- 如果我们还希望在这个过程中添加对应的polyfill,那么ts-loader是无能为力的;
- 需要借助于babel来完成polyfill的填充功能;
- 使用babel-loader(Babel)来直接编译TypeScript
- 也可以将ts转换成js,并且可以实现polyfill的功能;
- 但是babel-loader在编译的过程中,不会对类型错误进行检测;
那么在开发中,如何可以同时保证两个情况都没有问题呢?
TypeScript官网给出了建议 (opens new window)
When making a modern JavaScript project, you might ask yourself what is the right way to convert files from TypeScript to JavaScript?
A lot of the time the answer is “it depends”, or “someone may have decided for you” depending on the project. If you are building your project with an existing framework like tsdx (opens new window), Angular (opens new window), NestJS (opens new window) or any framework mentioned in the Getting Started (opens new window) then this decision is handled for you.
However, a useful heuristic could be:
- Is your build output mostly the same as your source input files? Use
tsc- Do you need a build pipeline with multiple potential outputs? Use
babelfor transpiling andtscfor type checking
也就是说使用Babel来完成代码的转换,使用tsc来进行类型的检查。
在package.json中添加脚本
"scripts": {
  "build": "webpack",
  "build2": "npm run check & webpack",
  "check": "tsc --noEmit" // --noEmit 忽略输出
},
然后执行npm run build2,可以实现上述需求,在tsc类型校验之后,再进行构建。
# Vue的编译
在Webpack中编译Vue,首先安装相关依赖:
npm i vue vue-loader vue-template-compiler -D
在Webpack中配置Rule:
{
  test: /\.vue$/,
  use: "vue-loader",
},
{
  test: /\.less$/,
  use: [
    'style-loader',
    {
      loader: 'css-loader',
      options: {
        importLoaders: 2
      }
    },
    'postcss-loader',
    'less-loader'
  ]
}
同时需要在plugin中引入VueLoader的插件:
const { VueLoaderPlugin } = require("vue-loader");

plugins: [
  // other
  // ...
  new VueLoaderPlugin(),
],
Vue文件如下
App.vue
<template>
  <div id="app">
    <h2 class="title">{{message}}</h2>
  </div>
</template>

<script>
export default {
  data() {
    return {
      message: "Hello Vue"
    }
  }
}
</script>

<style scoped lang="less">
  .title {
    color: red
  }
</style>
vue_main.js
import { createApp } from 'vue'
import App from "./App.vue";

createApp(App).mount('#app')
编译后浏览器可以看到编译成功的红色Hello Vue。
# ESLint
# 认识ESLint
ESLint (opens new window)是一个静态代码分析工具(Static program analysis,在没有任何程序执行的情况下,对代码进行分析);
ESLint可以帮助我们在项目中建立统一的团队代码规范,保持正确、统一的代码风格,提高代码的可读性、可维护性;并且ESLint的规则是可配置的,我们可以自定义属于自己的规则。
早期还有一些其他的工具,比如JSLint、JSHint、JSCS等,目前使用最多的是ESLint。
# 使用ESLint
首先我们需要安装ESLint:
npm install eslint -D
然后我们可以使用命令创建ESLint的配置文件:
npx eslint --init
根据命令行提示可以生成.eslintrc.js配置文件,然后我们添加规则:
module.exports = {
  "env": {
    "browser": true,
    "commonjs": true,
    "es2021": true
  },
  "parserOptions": {
    "ecmaVersion": 12
  },
  "rules": {
    'no-unused-vars': 'error',
    quotes: ['warn', 'single'],
    'no-console': 0,
    'import/no-extraneous-dependencies': 0,
  }
};
JS文件main.js如下:
const message = "Hello World";

const foo = (info) => {
  console.log(info);
}

foo('abc')
执行检测,可以看到报错:
$ npx eslint .\src\main.js

D:\Code\Webpack\hello-webpack\10_webpack中eslint的使用\src\main.js
  1:7   error  'message' is assigned a value but never used  no-unused-vars
  1:17  error  Strings must use singlequote                  quotes

✖ 2 problems (2 errors, 0 warnings)
  1 error and 0 warnings potentially fixable with the `--fix` option.
# ESLint的文件解析
在命令行中选择react支持,生成如下配置:
module.exports = {
    "env": {
        "browser": true,
        "commonjs": true,
        "es2021": true
    },
    "extends": [
        "eslint:recommended",
        "plugin:react/recommended",
        "plugin:@typescript-eslint/recommended"
    ],
    "parser": "@typescript-eslint/parser",
    "parserOptions": {
        "ecmaFeatures": {
            "jsx": true
        },
        "ecmaVersion": 12
    },
    "plugins": [
        "react",
        "@typescript-eslint"
    ],
    "rules": {
    }
};
字段含义:
- env:运行的环境,比如是浏览器,并且我们会使用es2021(对应的
ecmaVersion是12)的语法; - extends:可以扩展当前的配置,让其继承自其他的配置信息,可以是字符串或者数组(多个);
- parserOptions:这里可以指定ESMAScript的版本、sourceType的类型
- parser:默认情况下是
espree(也是一个JS Parser,用于ESLint),但是因为我们需要编译TypeScript,所以需要指定对应的解释器;
- parser:默认情况下是
- plugins:指定用到的插件;
- rules:自定义的一些规则;
- 格式是: 配置的规则名称:对应的值值可以是数字、字符串、数组。
- 字符串对应有三个值:
off、warn、error; - 数字对应有三个值:
0、1、2(分别对应上面的值); - 数组我们可以告知对应的提示以及希望获取到的值:比如
['error', 'double']
- 字符串对应有三个值:
- 格式是: 配置的规则名称:对应的值值可以是数字、字符串、数组。
# webpack中配置ESLint
在编译代码时,我们希望进行代码的eslint检测,这个时候就可以使用eslint-loader来完成
npm install eslint-loader -D
在Webpack中配置Rule:
{
  test: /\.jsx?$/,
  exclude: /node_modules/,
  use: [
    'babel-loader',
    'eslint-loader'
  ]
}
再执行构建,会出现如上相同报错。
# VSCode中的插件
我们在开发中通常会借助插件来更好地使用ESLint来检查代码。
这个插件会使用项目获取全局安装的ESLint库,然后默认读取项目目录下的ESLint配置,这里是.eslintrc.js文件,根据此文件配置规则来检查当前项目代码是否符合规范。
ESLint会帮助我们提示错误(或者警告),但是不会帮助我们自动修复。
这个插件可以在文件在保存时,自动修复代码中不符合规范的问题。
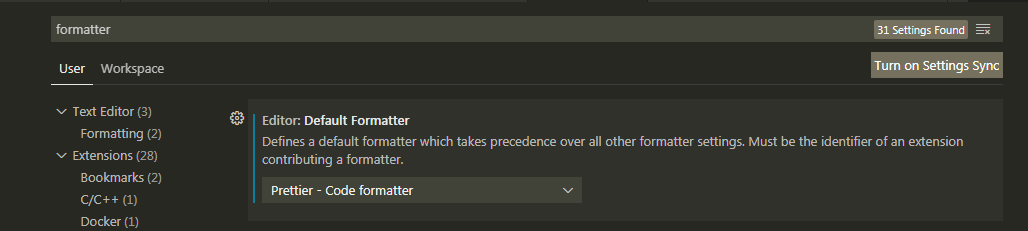
修改VSCode中的配置选项"editor.defaultFormatter": "esbenp.prettier-vscode"。
然后我们可以在项目目录下创建配置文件.prettierrc:
{
  "singleQuote": true,
  "trailingComma": "all",
  "printWidth": 100,
  "proseWrap": "never",
  "arrowParens": "avoid",
  "overrides": [
    {
      "files": ".prettierrc",
      "options": {
        "parser": "json"
      }
    }
  ]
}
此配置来自于ant-design (opens new window),关于插件的具体配置可以查阅Prettier官网 (opens new window)。