 Linux下搭建LNMP环境
# Linux下搭建LNMP环境
装环境之前,首先配置好yum源
# 一、安装PHP
# 1. 安装php的必要依赖
yum -y install gcc gcc-c++ openssl openssl-devel bzip2-devel libxslt libxslt-devel libmcrypt libmcrypt-devel libxml2 libxml2-devel autoconf libjpeg libjpeg-devel libpng libpng-devel freetype freetype-devel zlib zlib-devel glibc glibc-devel glib2 glib2-devel
# 2.获取安装包
官网上下载需要的包,解压进入解压目录。
tar -zxvf php-7.0.22.tar.gz
cd php-7.0.22
# 3.配置安装变量
./configure --prefix=/usr/local/php --enable-fpm --enable-mysqlnd --with-mysqli=mysqlnd --with-pdo-mysql=mysqlnd --with-iconv-dir --with-freetype-dir=/usr/local/freetype --with-jpeg-dir --with-png-dir --with-zlib --with-libxml-dir=/usr --enable-xml --disable-rpath --enable-bcmath --enable-shmop --enable-sysvsem --enable-inline-optimization --with-curl --enable-mbregex --enable-mbstring --enable-intl --with-mcrypt --enable-ftp --with-gd --enable-gd-native-ttf --with-openssl --with-mhash --enable-pcntl --enable-sockets --with-xmlrpc --enable-zip --enable-soap --with-gettext --enable-fileinfo --enable-opcache --with-xsl --with-xpm-dir=/usr
--with-fpm-user=admin --with-fpm-group=admin 如果需要设置php-fpm的用户和用户组,加上这个 不用的话别加,要不然后面启动的时候会报错
ERROR: [pool www] cannot get uid for user 'admin'
ERROR: FPM initialization failed
此时,找到php-fpm的配置文件修改user=nobody group=nobody 如果谁都可以启的话
报错:
configure: error: mcrypt.h not found. Please reinstall libmcrypt.
解决: yum install libmcrypt-devel -y
==./configure 作用: 软件配置与检查==
- 定义需要的功能选项
- 检测系统环境是否符合安装要求
- 把定义好的功能选项和检测系统环境的信息都写入Makefile文件,用于后续的编辑
配置安装变量时提示:
No package libmcrypt available.
No package libmcrypt-devel available.
之前安装依赖时候,安装过这个两个包,但是yum源中没有这两个包,更新yum源
yum -y upgrade

yum -y install epel-release  //扩展包更新包

yum -y install libmcrypt libmcrypt-devel  // 重新安装这两个包
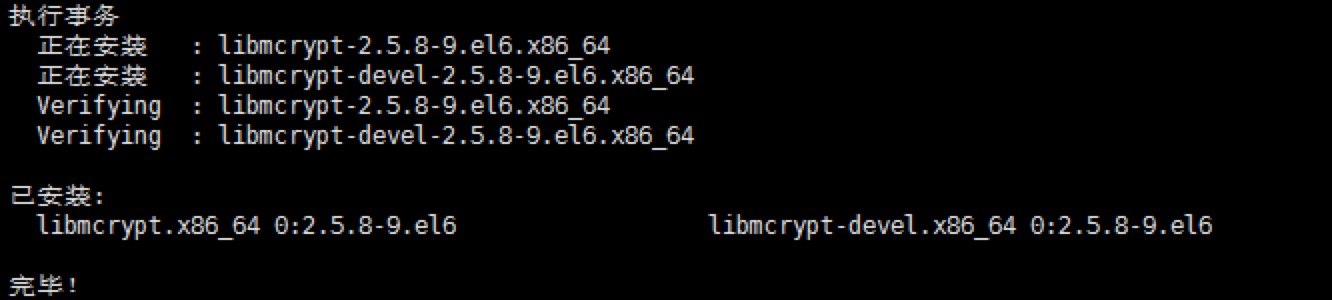
安装成功。
重新执行 ./configure
出现 Thank you for using PHP.
###4.进行make操作
编译会花费一些时间,耐心等待即可。编译完成的最后会提示你执行make test命令。就是对上一步 make 的检查,要确保 make 是没有错误的,也就是这一步的 test、check要全部是 OK 的,error 为0。
###5.安装
make install
###6.配置PHP
将PHP源码包中的php.ini-development文件复制到/usr/local/php/下,更名为php.ini。
cp /usr/local/src/php-7.0.22/php.ini-development /usr/local/php/php.ini

cp /usr/local/php/etc/php-fpm.conf.default /usr/local/php/etc/php-fpm.conf

cp /usr/local/php/etc/php-fpm.d/www.conf.default /usr/local/php/etc/php-fpm.d/www.conf
配置php.ini cgi.fix_pathinfo=0
####启动php-fpm服务:
/usr/local/php/sbin/php-fpm
设置php-fpm开机自启
创建脚本文件
vi /etc/init.d/php-fpm写入脚本并保存退出
#!/bin/sh
       #
       # php-fpm - this script starts and stops the php-fpm daemin
       #
       # chkconfig: - 85 15
       # processname: php-fpm
       # config:      /usr/local/php/etc/php-fpm.conf

       set -e

       PATH=/usr/local/sbin:/usr/local/bin:/sbin:/bin:/usr/sbin:/usr/bin
       DESC="php-fpm daemon"
       NAME=php-fpm
       DAEMON=/usr/local/php/sbin/$NAME
       CONFIGFILE=/usr/local/php/etc/php-fpm.conf
       PIDFILE=/usr/local/php/var/run/$NAME.pid
       SCRIPTNAME=/etc/init.d/$NAME

       # If the daemon file is not found, terminate the script.
       test -x $DAEMON || exit 0

       d_start(){
           $DAEMON -y $CONFIGFILE || echo -n " already running"
       }

       d_stop(){
           kill -QUIT `cat $PIDFILE` || echo -n " no running"
       }

       d_reload(){
           kill -HUP `cat $PIDFILE` || echo -n " could not reload"
       }

       case "$1" in
           start)
               echo -n "Starting $DESC: $NAME"
               d_start
               echo "."
               ;;
           stop)
               echo -n "Stopping $DESC: $NAME"
               d_stop
               echo "."
               ;;
           reload)
               echo -n "Reloading $DESC configuration..."
               d_reload
               echo "Reloaded."
               ;;
           restart)
               echo -n "Restarting $DESC: $NAME"
               d_stop
               # Sleep for two seconds before starting again, this should give the nginx daemon some time to perform a graceful stop
               sleep 2
               d_start
               echo "."
               ;;
           *)
               echo "Usage: $SCRIPTNAME {start|stop|restart|force-reload)" >&2
               exit 3
               ;;
       esac
       exit 0
修改权限
chmod a+x php-fpm测试并设置开机自启
$ /etc/init.d/php-fpm --help

   Usage: /etc/init.d/php-fpm {start|stop|restart|force-reload)

$ chkconfig php-fpm on
# 二、安装Nginx
# 1.官网上下载Nginx,并安装依赖
yum -y install gcc pcre-devel zlib-devel openssl openssl-devel
# 2.安装
## 解压
tar -zxvf nginx-1.9.9.tar.gz
##进入nginx目录
cd nginx-1.9.9
## 配置
./configure --prefix=/usr/local/nginx
# make
make
make install

# cd到刚才配置的安装目录/usr/loca/nginx/
./sbin/nginx -t

提示成功
nginx: the configuration file /usr/local/nginx/conf/nginx.conf syntax is ok
nginx: configuration file /usr/local/nginx/conf/nginx.conf test is successful
# 3.访问
浏览器中访问ip,网页没有任何显示,是防火墙,80端口没开,开启80端口
/sbin/iptables -I INPUT -p tcp --dport 80 -j ACCEPT
/etc/rc.d/init.d/iptables save
/etc/init.d/iptables restart
再访问就正常了。
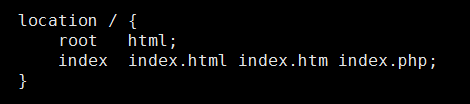
# 4.配置Nginx
编辑nginx配置文件/usr/local/nginx/conf/nginx.conf,主要修改nginx的server {}配置块中的内容,修改location块,追加index.php让nginx服务器默认支持index.php为首页:
打开php配置模块:
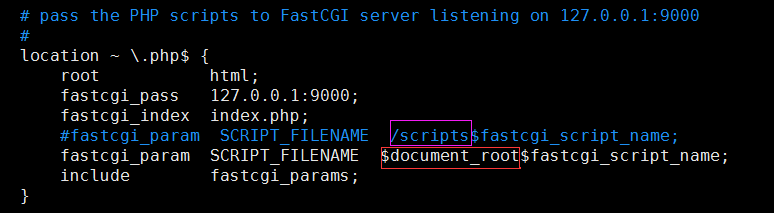
这里面很多都是默认的,root是配置php程序放置的根目录,主要修改的就是fastcgi_param中的/scripts为$document_root
修改完这些保存并退出,然后重启nginx:
/usr/local/nginx/sbin/nginx -s reload
# 5.测试
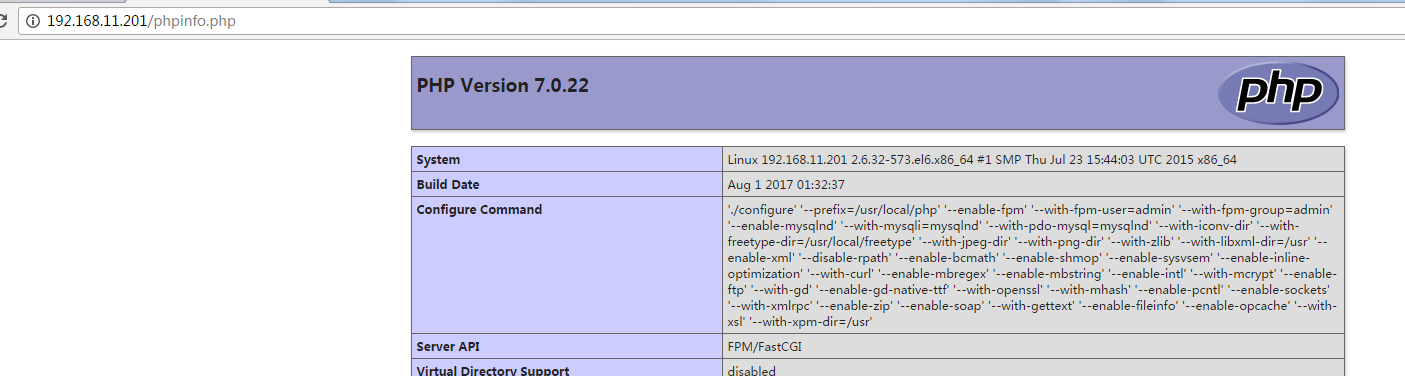
创建index.php:
<?php
    phpinfo();
?>
访问:
# 6.配置Nginx全局变量
# 在linux系统的/etc/init.d/目录下创建nginx文件
vim /etc/init.d/nginx
在文件中添加如下脚本,自定义安装的话:
nginx=”/usr/sbin/nginx”                         #修改成nginx执行程序的路径。
NGINX_CONF_FILE=”/etc/nginx/nginx.conf”         #修改成配置文件的路径。
#!/bin/sh
#
# nginx - this script starts and stops the nginx daemon
#
# chkconfig:   - 85 15
# description:  Nginx is an HTTP(S) server, HTTP(S) reverse \
#               proxy and IMAP/POP3 proxy server
# Source function library.
. /etc/rc.d/init.d/functions
# Source networking configuration.
. /etc/sysconfig/network
# Check that networking is up.
[ "$NETWORKING" = "no" ] && exit 0
nginx="/usr/local/nginx/sbin/nginx"
prog=$(basename $nginx)
NGINX_CONF_FILE="/usr/local/nginx/conf/nginx.conf"
[ -f /etc/sysconfig/nginx ] && . /etc/sysconfig/nginx
lockfile=/var/lock/subsys/nginx
make_dirs() {
   # make required directories
   user=`nginx -V 2>&1 | grep "configure arguments:" | sed 's/[^*]*--user=\([^ ]*\).*/\1/g' -`
   options=`$nginx -V 2>&1 | grep 'configure arguments:'`
   for opt in $options; do
       if [ `echo $opt | grep '.*-temp-path'` ]; then
           value=`echo $opt | cut -d "=" -f 2`
           if [ ! -d "$value" ]; then
               # echo "creating" $value
               mkdir -p $value && chown -R $user $value
           fi
       fi
   done
}
start() {
    [ -x $nginx ] || exit 5
    [ -f $NGINX_CONF_FILE ] || exit 6
    make_dirs
    echo -n $"Starting $prog: "
    daemon $nginx -c $NGINX_CONF_FILE
    retval=$?
    echo
    [ $retval -eq 0 ] && touch $lockfile
    return $retval
}
stop() {
    echo -n $"Stopping $prog: "
    killproc $prog -QUIT
    retval=$?
    echo
    [ $retval -eq 0 ] && rm -f $lockfile
    return $retval
}
restart() {
    configtest || return $?
    stop
    sleep 1
    start
}
reload() {
    configtest || return $?
    echo -n $"Reloading $prog: "
    killproc $nginx -HUP
    RETVAL=$?
    echo
}
force_reload() {
    restart
}
configtest() {
  $nginx -t -c $NGINX_CONF_FILE
}
rh_status() {
    status $prog
}
rh_status_q() {
    rh_status >/dev/null 2>&1
}
case "$1" in
    start)
        rh_status_q && exit 0
        $1
        ;;
    stop)
        rh_status_q || exit 0
        $1
        ;;
    restart|configtest)
        $1
        ;;
    reload)
        rh_status_q || exit 7
        $1
        ;;
    force-reload)
        force_reload
        ;;
    status)
        rh_status
        ;;
    condrestart|try-restart)
        rh_status_q || exit 0
            ;;
    *)
        echo $"Usage: $0 {start|stop|status|restart|condrestart|try-restart|reload|force-reload|configtest}"
        exit 2
esac
保存脚本文件后设置文件的执行权限:
chmod a+x /etc/init.d/nginx # a+x参数表示 ==> all user can execute 所有用户可执行
然后就可以通过这个脚本对nginx进行管理了
/etc/init.d/nginx —status-all

Usage: /etc/init.d/nginx {start|stop|status|restart|condrestart|try-restart|reload|force-reload|configtest}
使用chkconfig管理列表:
先将nginx服务加入chkconfig管理列表:
chkconfig --add /etc/init.d/nginx加完这个之后,就可以使用service对nginx进行启动,重启等操作
$ service nginx --status-all Usage: /etc/init.d/nginx {start|stop|status|restart|condrestart|try-restart|reload|force-reload|configtest}
设置终端模式开机启动
$ chkconfig nginx on查看
chkconfig --list
# 三、安装Mysql
# 1.安装必要依赖
yum –y install gcc gcc-c++ gcc-lib ncurses-devel cmake
# 2.官网上下载mysql
tar -zxvf mysql-5.6.37.tar.gz
cd mysql-5.6.37
# 3、编译
# 1
cmake \
-DCMAKE_INSTALL_PREFIX=/usr/local/mysql \
-DMYSQL_DATADIR=/usr/local/mysql/data \
-DSYSCONFDIR=/usr/local/mysql \
-DWITH_MYISAM_STORAGE_ENGINE=1 \
-DWITH_INNOBASE_STORAGE_ENGINE=1 \
-DWITH_MEMORY_STORAGE_ENGINE=1 \
-DWITH_READLINE=1 \
-DMYSQL_UNIX_ADDR=/var/lib/mysql/mysql.sock \
-DMYSQL_TCP_PORT=3306 \
-DENABLED_LOCAL_INFILE=1 \
-DWITH_PARTITION_STORAGE_ENGINE=1 \
-DEXTRA_CHARSETS=all \
-DDEFAULT_CHARSET=utf8 \
-DDEFAULT_COLLATION=utf8_general_ci

####################################################
CMake Warning:
  Manually-specified variables were not used by the project:
    WITH_MEMORY_STORAGE_ENGINE
    WITH_READLINE
######################################################


#2################################
make –j #
#3################################
make install
# 4.修改配置文件
my.cnf配置文件放置/usr/local/myslql目录下,配置文件如下,根据具体情况修改:
[mysqld]
user = mysql
port = 3306
socket = /var/lib/mysql/mysql.sock
basedir = /usr/local/mysql
datadir = /usr/local/mysql/data

#default-character-set=utf8
#skip-name-resolve

lower_case_table_names=1
back_log = 600
max_connections = 3000
max_connect_errors = 1000

table_open_cache = 4096
max_allowed_packet = 32M
sort_buffer_size = 16M
join_buffer_size = 16M
thread_cache_size = 512
thread_concurrency = 16
query_cache_size = 128M
query_cache_limit = 4M
query_cache_min_res_unit = 2k
default-storage-engine = InnoDB
thread_stack = 512K
tmp_table_size = 256M
max_heap_table_size = 256M

long_query_time = 6
slow-query-log=1
slow-query-log-file=/usr/local/mysql/logs/slow.log
#log-queries-not-using-indexes

log-bin=/usr/local/mysql/data/mysql-bin
binlog_cache_size = 4M
max_binlog_cache_size = 512M
max_binlog_size = 512M
binlog-ignore-db=mysql
log-slave-updates
replicate-ignore-db=mysql
binlog_format=ROW

innodb_additional_mem_pool_size = 64M
innodb_buffer_pool_size = 512M
innodb_data_file_path = ibdata1:32M:autoextend
innodb_file_io_threads = 4
innodb_thread_concurrency = 8
innodb_flush_log_at_trx_commit = 2
innodb_log_buffer_size = 16M
innodb_log_file_size = 128M
innodb_log_files_in_group = 3
innodb_max_dirty_pages_pct = 90
innodb_lock_wait_timeout = 120

[mysqldump]
quick
max_allowed_packet = 32M

[mysqld_safe]
log-error=/usr/local/mysql/logs/mysql.err
pid-file=/usr/local/mysql/data/mysqld.pid
open_files_limit = 20480
切换到已经安装的目录,创建配置文件中的logs文件夹
# 5.创建用户,修改所属关系
groupadd mysql
useradd -g mysql mysql -s /bin/false
# 6.初始化mysql
cd /usr/loca/mysql/scripts

./mysql_install_db --datadir=/usr/local/mysql/data --user=mysql --basedir=/usr/local/mysql
# 7.规划启动脚本
cp /usr/local/mysql/support-files/mysql.server /etc/init.d/mysqld
# 设置开机自启
chkconfig mysqld on
输入mysqld提示command not found 把mysql配置到环境变量 创建mysql.sh并添加
#1、 创建mysql.sh文件
vim /etc/profile.d/mysql.sh
#2、添加 保存
export PATH=$PATH:/usr/local/mysql/bin
#3、执行
source /etc/profile.d/mysql.sh
#4、测试 查看配置的环境变量是否有效
service mysqld —help
service mysqld --status-all

./support-files/mysql.server start

# 报错了
Starting MySQL.170802 23:25:04 mysqld_safe error: log-error set to '/usr/local/mysql/logs/mysql.err', however file don't exists. Create writable for user 'mysql'.
The server quit without updating PID file (/usr/local/mysql/data/192.168.11.201.pid).

解决:
echo "" > /usr/local/mysql/logs/mysql.err
chown -R mysql:mysql /usr/local/mysql/logs/mysql.err
service mysql restart
# 8.启动服务,构建数据库账户信息
grant all on *.* to 'root'@'192.168.%.%' identified by 'root';
create database DATABASE_NAME;
删除行:delete from DB_name.tb_name where *=x ;